Hello Friends! Sorry I've been silent for a few days, major computer issues going on and everything is taking way too much time to get done!
Anyway... today I have a tutorial to share coloring a new image from the Bebunni Floral collection called Birthday Blossom.

Step 1: Select Spectrum Noir Marker colors using the Spectrum Noir Color chart (available for download from the Spectrum Noir Website). Below you can see the markers I selected for Bebunni and for the flowers.

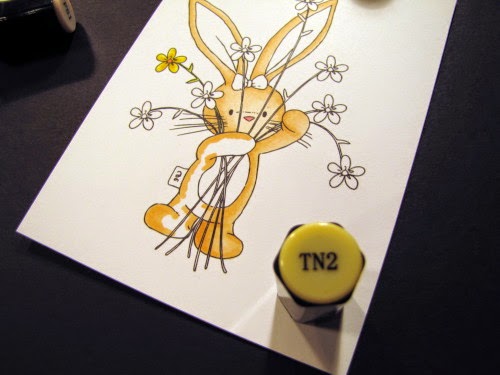
Step 2: For Bebunni, start with the darkest color (TN2) and color the outside edges of one ear.

Step 3: Add the next darkest color (FS4) and color in the rest of the ear slightly going over the TN2 to blend the colors.

the finished ears

Step 4: Next, use the TN2 on the face and arm, then use the FS4 and lastly, add FS1 to blend all the colors.

Step 5: Repeat Step 4 on the other arm and body. It is important to work on small sections so your ink stays wet because it will blend better.


Step 6: Use the FS4, FS1 and blender markers to add/remove color on Bebunni's tummy until you are happy with the result.

Step 7: Add FS8 to the inside of the ears, starting at the base and flicking the color toward the point of the ear.
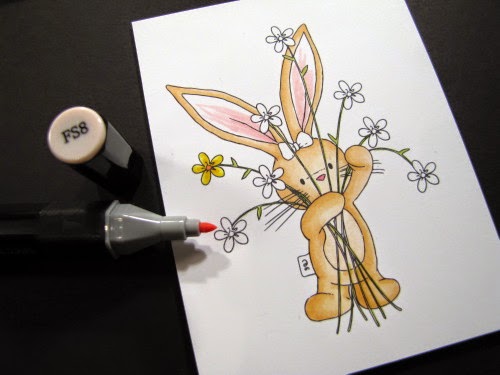
Step 8: Add FS6 to the rest of the ear going over the FS8 to blend the colors.

Step 9: Color a few of the flowers with CT1.

Step 10: Add CT4 to the edge of each petal.

Step 11: Add GB6 to the inside lines of the flowers and OR2 to each flower center and the bow.

Step 12: Using the Spectrum Noir Blendable Colored Pencil (#58) color the stems of the flowers. I used the pencil rather than a marker because the lines on the stems were so narrow.

I hope you found this tutorial helpful ~ happy coloring!


1 comment:
love the bebunni images! Your coloring is so lovely too!
Post a Comment