Saturday, January 30, 2016

Time for the Super Bowl!

As the BIG GAME approaches, it's time to get those party plans figured out and decorations!  I made this fun party ensemble in honor of the Super Bowl, but it would be perfect for any football themed party!   The supplies I used are from Crafter's Companion and they were a blast to make!  You can see the entire ensemble with directions on the Crafter's Companion Blog today!


Here are some fun football cupcake wrappers using the Die'sire Scallop Cupcake Wrapper.  I made the footballs using a Textures Hessian Embossing Folder & Die'sire circle dies ~ easy peasy!!!

Check out the Crafter's Companion Blog for step-by-step pictures/instructions on how to make the footballs. 


Snack Box with a Appetizer Marker


Popcorn Box & Appetizer Markers


Popcorn Box with Snack Boxes


GO BRONCOS!!


Supplies used for these projects:

The Big Score
The Ultimate Tool, Sweet Treats Boards (Popcorn Box)
Die'Sire Circle Dies, Alphabet & Number Dies, Scallop Cupcake Wrapper, Scallop Circles, Cupcake Insert - Flag Die, Pennant Bunting, Bebunni Stars
Textures Embossing Folder - Hessian
Star Embossing Folder

Thursday, January 28, 2016

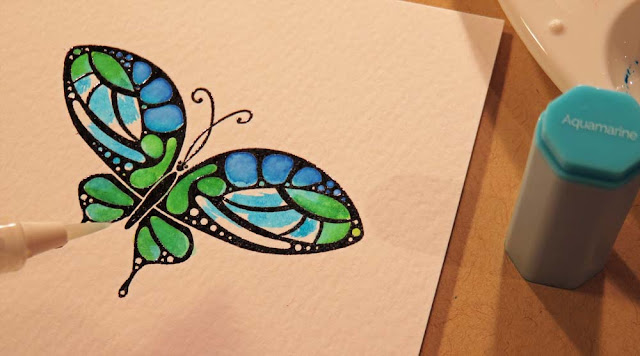
Butterfly Two-Ways with Spectrum Aqua Markers

Hi Friends!  I'm back today with a few more cards and a tutorial with the new Stamp TV Kit by Gina K Designs.  The kit is called Made with Love and it's AWESOME!  It's one of my favorite Stamp TV kits EVER and I'm sure it's gonna sell out before long!  If you missed my tutorial from Monday, check it out HERE.

I used the beautiful butterfly from the Made With Love stamp set and I added sentiments from the new Incentive Set from Gina K called Massive Messages ~ it's free with a $75 purchase. Today I want to show you two different techniques using the Spectrum Aqua Markers.   The great part about using watercolor markers is that they are very forgiving.  If your shade is too dark, add some water.  If the shading is too light, add more color.


Step 1: Stamp image in Staz-On Jet Black Ink on watercolor cardstock.

Step 2: Select coordinating shades of Spectrum Aqua Markers ~ Bud Green, Aquamarine, Teal & Peacock Blue ~ and scribble the ink on to a paint palette directly from the marker.


Step 2: Using a water brush, add some Peacock Blue to areas of the butterfly.


Step 3: For some contrast, add a lighter blue ~ Aquamarine to the same areas.


Step 4: Add Bud Green with the waterbrush.


Step 5: Mix in some Teal


Step 6:  Next I added Aquamarine to the remaining areas directly from the marker.


Step 7: Use the waterbrush to blend everything.

TIP: If the colors are too dark, dab with a paper towel while the colors are wet.

This is how my butterfly came out... I'm sure if I did it again, it would turn out differently.  Just play and experiment.


For the next technique, I used the same butterfly and the same colors.

Step 1: Use the Teal Spectrum Aqua Marker and add color directly to the stamp.


Step 2: Next add Peacock Blue to some of the outside lines.


Step 3: Add Bud Green to the rest of the open areas.


Step 4: Spritz the image with water & stamp on watercolor paper.

TIP:  Spectrum Noir Watercolor Cardstock is my favorite cardstock to work with for watercolor products because it is thick so it holds up while working with water and colors. It is perfect for blending.


Step 5: Using a waterbrush, blend the colors on each area of the image.


The finished butterfly...


 Don't worry if your butterflies don't look just like mine... they come out different every single time & that's the fun of watercoloring.... there are no rules!

Tuesday, January 26, 2016

Crafter's Companion Introduces Downton Abbey on HSN!

After months and months of waiting, Crafter's Companion is introducing the Official Downton Abbey Papercrafting Collection exclusively on HSN today!  This collection is AMAZING!!!  I know you won't want to miss out on this!!

Here is one of the projects I made with the Downton Abbey Papercrafting Collection!


And here is the inside of my card!


Don't miss out on any of the HSN shows today!


Happy Crafting!!

Monday, January 25, 2016

Gina K Inspirational Blog Hop and Tutorial

The Cast and Crew for Gina K Designs welcomes you to another fabulous Inspiration Blog Hop! This blog hop is for our January Release!  We hope to inspire you with some beautiful card projects as you hop along in the hop this month!  Enjoy the gorgeous inspiration samples from the team and then comment on each blog for your chance to win an awesome grab bag of GKD goodies!!!  To see who won, check the Big News Forum at StampTV a few days after the hop.

For my card today I made some super cute watercolored Rosy-Posie blooms with my Spectrum Aqua Markers.  Scroll down to check out how I made them...


Step 1:  Attach the clear leaf stamps to an acrylic block.  I spaced them diagonally and then held it up to the paper so I knew how far apart to put them.

Step 2: Use Spectrum Aqua - Sea Green marker and add color from the marker directly to the stamp in just a few areas on each leaf.

Step 3: Add Bud Green to the rest of each leaf and the stems.


Step 4: Lightly spritz with water directly on the stamp and on the watercolor paper.


Step 5: Stamp the image on the pre-cut watercolor paper.  (Paper is trimmed 3 3/4" x 5")


Step 6: Stamp flower image on watercolor paper three times with white ink then add white embossing powder and heat emboss.


Step 7: Add some Rose Pink, Gold and Amber ink from the Spectrum Aqua markers to a paint palette.


Step 8: Begin with Rose Pink Spectrum Aqua ink and paint to various areas of the flower using a waterbrush.


Step 9: Next add Gold Spectrum Aqua ink with the waterbrush to the areas that are not yet colored.


Step 10: Next add Amber Spectrum Aqua ink with the waterbrush to the outside edges of the flower.  Add more of the other colors until you get desired shading.


The finished flowers colored basically the same way.


Step 11: Cut the flowers out with scissors and layer on the card front with foam adhesive.  Stamp a sentiment and add pink rhinestone gems to embellish.


Ready for more awesome creations?! Just click on the links below for more from the Illustrators and Design Team!!


Thank you for stopping by! Don’t forget to stop by the Gina K Designs Store to purchase this awesome STV kit  at http://www.ginakdesigns.com.

Friday, January 22, 2016

HSN & Crafter's Companion Sneak Peek!

Happy Friday to you!!!  Today I have a sneak peek of one of the fabulous collections that Sara Davies from Crafter's Companion is presenting next Tuesday on HSN.    She will be on the show all day {and night} presenting tons of fabulous products.

My card below is part of Sara's Signature Collection ~ Butterfly Lullaby.  This lovely collection will be exclusively sold on HSN!!


Card Tips: For my card layout, I used a 4 1/4" x 4 1/4" card base and then added the Happy Birthday circle to the top.  The card measures just under 5 1/2" tall and will still fit inside a standard invitation size envelope.  

Also, to make the Happy Birthday sentiment stand out, I cut it out twice.  Once in dark purple and and then added the pink one on top.  I let just the edge of the purple show so it would make the pink pop a bit more.

Check out the Crafter's Companion Blog for some fabulous "Win before you Buy" giveaways.


Have a GREAT weekend!

Thursday, January 21, 2016

Marching Band Pages for Matt!

Hello my crafty friends!  I am super happy to share these fun pages with you today.  One of my goals this year is to scrapbook more AND another is to keep up with Matt's marching band scrapbooks so that I don't fall so far behind like I did with Megan's.  I ended up doing her last 3 years of band in about 3 months.

This this past weekend, I organized all of Matt's photos for his entire freshman year and everything so far for sophomore year.  I printed all of the photos and then put them in the pocket page protectors (think Project Life Albums).  After everything was organized, I started on the 12x12 layouts for each marching band season, which will introduce each year of his book.  I completed 11 layouts in all! I'm getting ready for a scrapbook getaway with my BFF & now I'm ready to go back and complete the pocket scrapbook pages for the rest of each year.

My first page is Matt's formal band photo as a Freshman in the Concord High School Marching Minutemen (15 yrs old).    Taken August 2014


Next up is Matt's formal band photo as a Sophomore in the Concord High School Marching Minutemen (16 yrs old).    Taken August 2015.   Such a handsome young man... and so sweet too!


I'm planning on using the same supplies and types of layouts that I did for Megan's books.  I think they look super sharp and clean... and they will go together pretty easily.

I'll share more of my pages in the upcoming weeks!  
Have a great day!

Tuesday, January 19, 2016

Watercolor Thank You!

Hello Friends!  I hope you had a wonderful weekend and a good start to the week.   It was a 3-day weekend here and it was nice to enjoy a little time off.

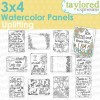
Today I wanted to share a card I made over Christmas Break using one of the watercolor panels from Taylored Expressions.  I love these little panels because they are so fast and easy to watercolor with any waterbased markers.  I just sat and colored one evening while watching TV with the family and assembled the super simple card later when I had time.


To color the panel, I used the Zig Clean Color Real Brush Markers ~ these are a blast to use & so easy!!  I added some felt embellishments using the amazing 100% Wool Taylored Expressions Felt & added some texture to the background with the Paisley Embossing Folder.  The card only took about 10 minutes to put together.


Have a Happy Day!


Taylored Expressions Supplies:


Thursday, January 14, 2016

TE Technique Day: Negative Die Cutting

Hi Everyone!  Today I want to share my project for this month's technique focus by the Taylored Expressions team.  This month we are focusing on the Negative Die Cutting Technique so rather than using the flowers or tree branch, I am using the part that is usually left behind.


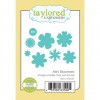
For the "hello" card, I used one of the flowers from the Mini Blooms Dies and then embossed cardstock behind the cut out with the Lots of Dots Embossing Folder.   The colors I used on the card are Cookie Monster, Oreo, and Salt Water Taffy.  For the white, I used watercolor paper for the texture.


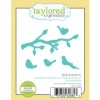
I used the Birds & Branch and the Build-A-Tag 3 die sets on this tag along with the C'mon Get Happy Stamp set for the sentiments.


Supplies for Tag & Card:


Blog Widget by LinkWithin
 
Blogger Template By Designer Blogs