Friday, February 27, 2015

TE Pinterest Inspired

TGIF friends!!!  I'm happy that the weekend is in sight since it has been such a busy week for me! Todoay I am sharing a card for Taylored Expressions that was inspired by a card on the Taylored Expressions Pinterest Boards by Courtney Kelley.


I was completely inspired by Courtney's clean & simple design but substituted the Zinnia Bouquet & Zinnia Bouquet die on my card and changed out the colors {supplies are linked below}.


Have a wonderful weekend and check in on Monday for the Taylored Expression March Sneak Peeks!  I can't wait to share what I've come up with for this release.


Supply List:


Wednesday, February 25, 2015

Envelobox Projects for Crafter's Companion

Hey There ~ here are a few more projects I made for the HSN show last week.  I used The Ultimate Crafter's Companion Tool,  the Envelobox Boards and the instructional DVD called The Ultimate Advanced Construction Techniques to make this box purse and some envelopes.   I constructed my box purse with 12x16 Construction Cardstock and then once it was constructed I added some cardstock and pattern paper layers to dress it up. 


and here a few envelopes I made with the same board.


Supply List: Envelopbox Purse
Envelobox Board for The Ultimate
9x12 Construction Cardstock
Dies: 3D Flowers Classique - Delicate Flower, Lace Bloom
Stamps: Sentimentals - Nature

Supply List: Decorated Envelopes

The Ultimate Tool (Envelope board on the cover & Bow Maker Pegs)
Opulence 11x17 Card Pack

Vintage Floral - Sentimentals

Tuesday, February 24, 2015

Desk Organizer

Hi Friends!  Last week on HSN, Sara Davies, the co-founder of Crafter's Companion, was sharing some fun products and here is one of the samples that I made for the show.  I used The Ultimate Crafter's Companion Tool along with the instructional DVD called The Ultimate Advanced Construction Techniques to make this fun desk organizer.   I constructed my box with 12x16 Construction Cardstock.  Then once the organizer was assembled, I added some cardstock and pattern paper layers to dress it up. 


Supplies Used:
Desk Organizer (project from Advanced Contruction Techniques DVD) 
Boxer Board
9x12 Construction Cardstock
The Ultimate Tool
Die'sire Essentials - Flowers for All Occasions
Sentimentals - Memories are Made; Vintage Floral Verses
Embossalicious Folder - Petite Dots

Monday, February 23, 2015

Let's Celebrate with Bebunni Floral

Happy Monday!  I hope it is bright and sunny where you are!  If not, these pretty flowers from the new Bebunni Floral collection are sure to brighten your day!  Crafter's Companion just came out with this new collection and last week our co-founder Sara Davies shared a few of the sets on HSN.  Guess what?  My card below was featured during the segment ~ cool huh?


Card Supply List:
Bebunni Floral - Bunches of Love

Spectrum Noir Markers - IG1, IG2, FS6, FS7, FS8, CR1, CR2, CR7, CR8, CR11, DR5, CT3, CT4, CG2, CG3, C4
Bebunni Dies - Cottage Lace
Die'sire Essentials - Just the Ticket
Embossalicious Folder - Petite Dots


Envelope Supply List:
Envelobox Board
9x12 Construction Cardstock
The Ultimate Tool
Bebunni Dies - Cottage Lace; Cabbage Rose 
Die'sire Essentials - Ovals; Scallop Ovals; Beautiful Butterflies
Bebunni Floral - Bloom & Grow (sentiment)

Friday, February 20, 2015

Gina K & Spectrum Noir Tutorial: Coloring Vases

Happy TGIF!  Today I have a tutorial to share using some beautiful Gina K Designs sets and my Spectrum Noir Markers.    We all love coloring flowers, but some of those pretty blooms need a place to be like a vase, a flower pot, or a water pitcher.  All three of those are usually round and that requires a little bit different coloring technique.

The card I made below uses the water pitcher from the Stately Flowers 9 set along with flowers & sentiment from the Vogue Vases 2 stamp set.


Step 1: Stamp the image on cardstock and select the group of markers ~ I used the IG color family of IG1 - IG5.

Step 2: Using the darkest shade (IG5), color one side of the image.


Step 3: Using the next darkest shade (IG4), color the next portion of the image.  Overlap the first color until you get a good blend.


Step 4: Repeat on the opposite side of the image using IG5 and then IG4.  Note: I wasn't very careful with the edges because I knew I was going to cut out my image. 


Step 5: Add IG3 next, on both sides of the image.


Step 6: Fill in the remaining area with IG2.  Keep going over the area with IG2 and IG1 to get a good blend.


Step 7: Use IG5 on the handle.  Then add IG4 and IG3 until you get the blend you like.


Step 8: Add a touch of IG6 to the base of the image.


Step 9: Cut the image out with scissors and/or a craft knife.  Then stamp the flower images on a card panel and pop up the pitcher or vase on the card.


See how simple that is!  If you don't have these shades of gray, substitute with what you have.


Thursday, February 19, 2015

Spectrum Aqua Pens with Solid Stamps

Happy Thursday!  It is super cold {like below zero wind chills cold} up here in Northern Indiana and so I really need bright happy colors today!  This beautiful butterfly is just the trick!  

For my card today, I used the Sheena Douglass Flying Colors stamp set and my Spectrum Aqua Markers and it was SO EASY!!  I simply used my Spectrum Aqua Markers (Moss, Marine, Charcoal) and scribbled the colors directly on my stamp, spritz the stamp and watercolor paper with a fine mist of water and then stamp the image on the paper.  To spread the colors, I used a waterbrush and pulled the Moss from the outer edge to the center and the Marine blue from the center out.  The key is... don't over work it.


Have a Happy Day!

Wednesday, February 18, 2015

HSN Project for Crafter's Companion: Divided Box

Hi Friends!  Today on HSN, Sara Davies, the co-founder of Crafter's Companion, will be sharing some fun products and here is one of the samples that I made for the show.  I used The Ultimate Crafter's Companion Tool along with the instructional DVD called The Ultimate Advanced Construction Techniques to make this adorable divided box.   I constructed my box  & dividers with 12x16 Construction Cardstock and the Boxer Board.  Then once the box was assembled, I added some cardstock and pattern paper layers to dress it up.

The tag is die from Die'sire called Scalloped Dies that includes a sentiment from the Bebunni Floral Set - Bloom & Grow and it is embossed with the Embossing Folder from Sugar & Spice Butterfly Love.


Tune in to HSN today for lots of great inspiration ~ here's a link to the schedule!  While you're over on the Crafter's Companion FB page, click "LIKE" so you can see great new products and projects each and every day!

Tuesday, February 17, 2015

TE Die Focus: Poster Graphic #'s

Hi Friends!  Today I have a card to share using a number die set from Taylored Expressions.  Number dies are great for scrapbooking but they are fun to use on cards and can easily be the focal point for a special birthday or anniversary. Since my daughter is a senior now, she has lots of friends turning 18, so I thought this was the perfect card to keep on hand for her to use.


I used the Poster Graphic #'s on the embossed background in the same color and then I added the "happy" and the "18" in a coordinating color to stand out.  {supplies & links listed below}


Have a great day & thanks for popping in today.


Supply List:


Monday, February 16, 2015

Spectrum Aqua Pens.... so in love!!!

Everything lined up perfectly this weekend... for crafting that is!  On Friday, my Spectrum Aqua pens arrived from Crafter's Companion and then on Saturday morning we had a blizzard and the whole county shut down (including church on Sunday).  I'm sure I don't need to tell you what I was up to... WATERCOLORING, of course!  Oh My Word... I am in love with these new Spectrum Aqua pens.  Seriously, I don't think watercoloring could be any easier then with these lovelies!

I stamped the large flower from the Sheena Douglass Flower Power set on watercolor paper with white pigment ink and then heat embossed it with white embossing powder.  After that, I just started laying down colors.  For the large flower, I used Crimson, Pink Rose, Begonia, Gold, and then used a watercolor brush to blend them.  Then I scribbled a bit of Red Violet on one of my acrylic stamping blocks and used my watercolor brush to apply it to the petals.  I'm a bit bummed with the photograph, because it doesn't show the shading very well.  In real life, there is a ton of shading and layers of color. For the small flower, I used Crimson, Sunset, and Gold.  After blending them with a watercolor brush, I added a tiny bit of Red Violet the same way as I did on the large flower.  For the leaves, I used the set called A New Leaf and used the Moss and Olive Spectrum Aquas and a watercolor brush.  


{inspired by this card on Pinterest}

For the background piece, I embossed a piece of watercolor paper with the 8x8 Embossalicious Folder Grande Dots.  Then I scribbled the Desert Spectrum Aqua all over it and blended the color with my watercolor brush.  The sentiment is from the Vintage Floral set called Verses and I sprayed the white background with Desert Sand Fireworks spray.

I'll be doing a tutorial with these new Spectrum Aquas very soon... but I had to play with them first, so my first several cards won't have any step-by-step photos.  BUT... they are super easy to use!

Supplies from Crafter's Companion:

Spectrum Aqua - Large Flower: Crimson, Pink Rose, Begonia, Gold, Red Violet;
Small Flower: Crimson, Sunset, Gold, Red Violet;
Leaves: Moss, Olive;
Embossed Background piece: Desert
Stamp sets: Sheena Douglass - Flower Power; A New Leaf; Vintage Floral Verses
Memento - Tuxedo Black 
Memento Luxe - Wedding Dress White
Embossing Folder: 8x8 Grande Dots
Fireworks Spray: Desert Sand

Friday, February 13, 2015

Fun Background Technique with Gina K & Spectrum Noir

Good Morning Peeps!

I'm not sure I've ever had a week with FOUR tutorials on my blog, but here goes another one that I made for
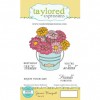
 Gina K Designs and Spectrum Noir.  I'm super excited about this background paper I made!   Here's a peek of one project I made with the paper.  YUM!!!  Continue along and see how I made it...


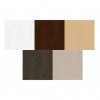
Step 1: Select several Spectrum Noir Ink Refills.  I used BP2, OR2, CR10 and CR6 (orange, pink and coral).  You will also need Blender solution.  You may need to play around with the colors you use to get things that blend well together.  It is very easy to make a big puddle of brown ink, so there may be some trial and error.


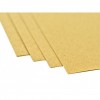
Step 2: Gather your other supplies ~ a full sheet of GLOSSY cardstock AND another half sheet of GLOSSY cardstock.   You will also need 2 sponge applicators. TIP: I like using sponges with very small gaps or holes so they don't leave big marks on my artwork.

Step 3: The half-sheet of Glossy Cardstock is going to be used as an ink palette or "scratch" paper.  Make sure you use Glossy Cardstock because the ink sits on top of the paper longer.   You could also use an actual art palette or some other slick surface for this along with the Spectrum Noir Markers if you don't have the ink refills.  NOTE: if you use the markers, make sure you use a slick surface rather than Glossy cardstock so you don't use up all of the ink in your marker.  Also, if you use markers, the colors won't be as vibrant.

Using the Ink Refill droppers, add a few drops of each color to the half-sheet of Glossy cardstock.  TIP: I usually drop them in different spots and then let them run together on their own.


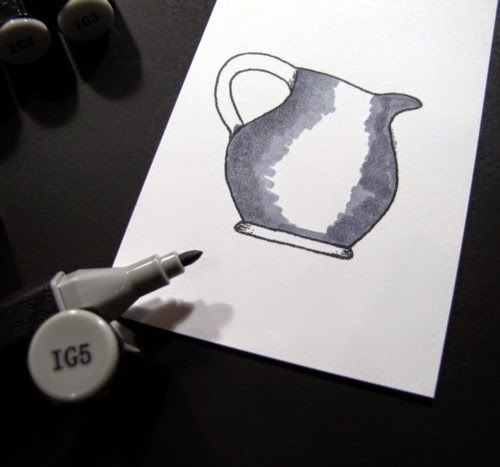
Step 4:  Using a sponge applicator, apply a small amount of blender solution to the sponge and then in a circular motion, mix the colors on your palette.

Step 5: Working somewhat quickly, using a circular motion, apply the ink to the full sheet of Glossy cardstock.  If it appears too dark or too bright, add some blender solution to your sponge applicator and go over it again.  


Step 6: Keep adding drops of ink refill to the palette and blender solution to the sponge applicator an continue until the full sheet of Glossy Cardstock is covered.

Step 7: Set aside to dry and then trim as desired to make your projects!


Project #1: Bokeh Technique


I have seen this technique made several different ways with dye and watercolor inks, so I decided to give it a go with background paper I made above with the Spectrum Noir Ink Refills.  The sentiment on my card is from the Flower Builders stamp set.


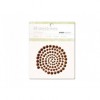
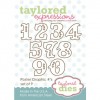
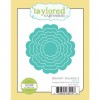
Step 1: While the background paper is drying, this is a good time to make a template.  Take out a piece of white cardstock and various sizes of circle dies.  Place the circle dies randomly on the cardstock and trim.  Just place them however you like... no rules.


Step 2:  Gather some white pigment ink (Wedding Dress White Memento Luxe ink); a sponge applicator; the circle template; background paper. 

Step 3: Dab the white ink and then rub it in with a circular motion, to apply white ink to the background paper.


Step 4: Continue to apply the white ink as desired & don't forget to overlap some of the circles as well.  Easy Peasy!


Project #2: White Embossed Flower Embellishments

Here is the second project I made with the background paper ~ I just stamped a flower from the Flower Builders stamp set with white pigment ink and embossed the flower with white embossing powder.  


I trimmed the flowers with scissors and then added a gem to the center.  I popped it up on my card and added some leaves from the Birthday Essentials Stamp TV Kit along with the sentiment.


Project #3: Background Paper

For my final project, I just used it as background paper and added the stamped image from the Birthday Essentials Stamp TV Kit on top.

Super fun and easy ways to use homemade background papers.
Blog Widget by LinkWithin
 
Blogger Template By Designer Blogs