Happy TGIF! Today I have a tutorial to share using some beautiful Gina K Designs sets and my Spectrum Noir Markers. We all love coloring flowers, but some of those pretty blooms need a place to be like a vase, a flower pot, or a water pitcher. All three of those are usually round and that requires a little bit different coloring technique.
The card I made below uses the water pitcher from the Stately Flowers 9 set along with flowers & sentiment from the Vogue Vases 2 stamp set.
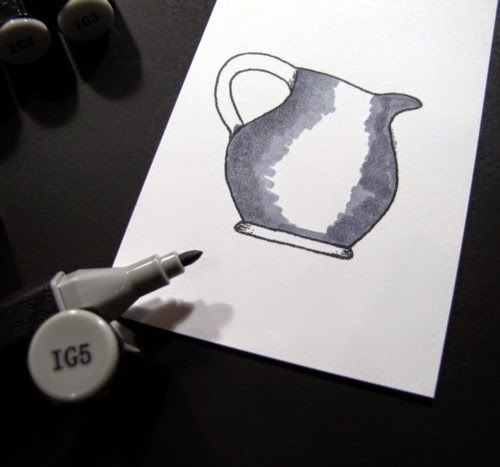
Step 1: Stamp the image on cardstock and select the group of markers ~ I used the IG color family of IG1 - IG5.
Step 2: Using the darkest shade (IG5), color one side of the image.
Step 3: Using the next darkest shade (IG4), color the next portion of the image. Overlap the first color until you get a good blend.
Step 4: Repeat on the opposite side of the image using IG5 and then IG4. Note: I wasn't very careful with the edges because I knew I was going to cut out my image.
Step 5: Add IG3 next, on both sides of the image.
Step 6: Fill in the remaining area with IG2. Keep going over the area with IG2 and IG1 to get a good blend.
Step 7: Use IG5 on the handle. Then add IG4 and IG3 until you get the blend you like.
Step 8: Add a touch of IG6 to the base of the image.
Step 9: Cut the image out with scissors and/or a craft knife. Then stamp the flower images on a card panel and pop up the pitcher or vase on the card.
See how simple that is! If you don't have these shades of gray, substitute with what you have.


No comments:
Post a Comment