The
Cast and Crew for Gina K Designs
welcomes you to a fabulous Inspiration Blog Hop {and my first}! Gina, along with the
Cast and Crew and Guest Designers, will inspire you with many beautiful ideas! As you hop through the blogs, make sure to leave a comment on each because we will choose a few random comments and those stampers will each
win a grab bag of Gina K. Designs products! To see the full list of winners
check the Big News Forum at StampTV a few
days after the hops. {hop links are listed below}
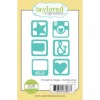
For my card today, I used the lovely new Fabulous Frames by Melanie Muenchinger and will share a tutorial on how I colored my flower.
For my card today, I used the lovely new Fabulous Frames by Melanie Muenchinger and will share a tutorial on how I colored my flower.

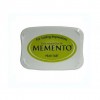
The outline background is a huge stamp and has about a million different uses. I decided to stamp it in black Memento Ink and then add color to the edge with my BT4 Spectrum Noir marker ~ which happens to match the Gina K Turquoise Sea cardstock perfectly.

Next, I stamped the flower image and trimmed it with scissors and added a bit of dark yellow (CT4) to the center.

Now it's time to color the flower petals. I started with a very light blue turquoise (BT2) and added it to one entire petal. This will help "prime" the cardstock and accept the colors I add to blend. It is important that you work with one small area at a time {in this case, one flower petal}, so that the markers will blend.
{Note: you may notice that on my BT2 marker below, that I switched out my chisel tip for a brush nib. This can be done on any of the new generation markers. Brush nibs are sold separately in packages of 3. For markers that I use a lot or when I want to use a "flicking" technique (below), I usually swap out for the brush nib.}

Next, I added a darker turquoise with BT4 and used the "flicking" technique. I started from the center and quickly added lines toward the outer edges picking up my marker slightly as I worked.

After I completed all 3 flower petals, I started on the leaves and colored the first leaf completely with CG1. The CG color family (Citrus Green), is probably my favorite group for greens.

For some variation on the leaf, I pulled out my CG3 marker.

However, I just wanted a hint of CG3 because there is so much black shading already stamped on the leaf. Therefore, I pulled out an old zip lock back (any slick surface will work) and added some color from my CG3 marker to the bag to use like a paint palette.

Then I took my CG1 brush nib and picked up some of the CG3 color to add to my leaf.

I again used the "flicking" motion to add my darker shades of green working from the center of the leaf out toward the edges.

For a little bit more shading, I then added some CG4 (the darkest green in that color family) on my slick surface and used the CG1 to apply it to my leaf.

Worried about your marker being "contaminated" with the darker colors? No worries, simply scribble it off on some scratch paper and it will return to the original color.

For a bit more contrast, I decided to add a bit more shading with my Spectrum Noir Blendable Colored Pencils. I used the 062 for the turquoise and added it to the edges of the petals and just off the darker turquoise in the center. Then I added some 056 for the green & 013 for the dark yellow in the center.

Here is the finished flower.

Now it's time to Hop! Don't forget to leave some love along the way...
Melanie Muenchinger - Illustrator
Fabulous Frames
Debbie Corbari
- Illustrator Let's Talk
Kendra Wietstock - you are here!
And our
Guests: