Thursday, July 31, 2014

sending a little love...

Hi Friends!  Today I have a quick little card using some fun stamps and dies from Taylored Expressions.  First I used the Bikes & Trikes Stamp set and then cut it with the matching Bike & Trike die set.   Once it was colored I just popped it up with some foam dots and then added the Maya Road cloud embellishment.  Super quick card ~ and we all LOVE that!


Supply List:


Wednesday, July 30, 2014

Crafter's Companion's Sheena Douglass Christmas Release

Later today at Crafter's Companion, we will be releasing a new collection of Chrismtas Stamps from Sheena Douglass.  This pretty ornament is from the new set called Christmas Bauble and the sentiment is from the Stamp-It Australia - Believe set.   I added a few scored lines for some texture using The Ultimate Tool.

To color my image, I used my Spectrum Noir Markers -  IG2, IG5, DG2, DG4, CR11, DR5, DR6, DR7 and Spectrum Noir Blendable Colored Pencils - 32, 33, 57, 59 along with Gamsol & Paper Blending Stumps to blend the colors.  I added some texture to the ornament with my Let It Snow Embossalicious Folder.  For the pattern paper, I printed it from the Vintage Christmas CD-ROM.


Thanks so much for stopping by today!

Tuesday, July 29, 2014

Tutorial with Spectrum Noir & Gina K Designs ~ Part 3

Last week, I shared two Spectrum Noir background techniques with you ~ one with ink refills and one with the markers.  Today I have one more to share with the ink refills and a pre-stamped image from the Gina K Designs set called Ship to Shore.   Here's the finished projects... scroll down for the step-by-step picture tutorial.


I gathered my supplies - 3 shades of blue ink refills (BT5, BT9, TB9), a bottle of Spectrum Noir Blender Solution, an applicator with felt and a piece of glossy cardstock with my image and sentiment stamped on it.  I stamped them in white pigment ink and heat embossed them with white embossing powder.


Next, I started with my lightest color (BT5) and using the dropper that comes with the bottle, I squirted droplets of ink all over the glossy cardstock.

Then I added the droplets of the next two colors (BT9, TB9).  Finally, I took my applicator (with Blender Solution on it) and dabbed it all over the glossy cardstock.


Just keep dabbing it until you get the look you want.  If you have too much ink, put a new piece of white felt on your applicator with more blender solution and then dab it some more.  I also added some Tim Holtz Silver Mixative and dabbed that around for a bit of sheen.


Note: Make sure you have your work surface covered with something other than paper (the ink will go through).  Also, I like to wear rubber gloves & an apron, since this process can be a little messy.

Monday, July 28, 2014

TE ~ Heart-FELT Birthday Wishes!

Hi Peeps!  Happy Monday!!!  It's the beginning of a very busy week for me with marching band activities; however, I've been creating up a storm and have lots of fun projects to share.

Today I have a card for Taylored Expressions using their beautiful new 100% wool felt!  There are 50 Delicious Colors and they are gorgeous!  AND... they cut perfectly with the Taylored Expressions Dies as well!


For my card today, I used 3 different colors of felt ~ Robin Egg, Moss, and Pink Sherbert.  I used the Bloom Where You're Planted & Little Bits Flowers dies for the stacked flowers.  I also trimmed the Robin Egg felt with the Small Scallop Border.  For my sentiment, I used the Notable Blooms set & then I added an embossed background using the Spotted Circle Cutting Plate.


Check out all of the beautiful colors of felt ~ I know you'll love them!

Supplies Used:


Friday, July 25, 2014

Spectrum Noir Marker Tutorial with Gina K ~ Part 2

Earlier this week, I shared a tutorial using Spectrum Noir Ink Refills.  Today, I'm going to share another background technique, this time with the 
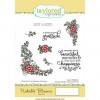
Spectrum Noir Markers.   Once again, I am using the Gina K Designs set called Ship to Shore.    Here's the finished projects... scroll down for the picture step-by-step tutorial.


I started with 4 shades of blue Spectrum Noir Markers (BT5, BT6, BT9, TB9), a bottle of Spectrum Noir Blender Solution, a piece of glossy cardstock, and an applicator with felt.  I use the Tim Holtz applicator and just cut scraps of white felt to go on top. I added several drops of blender solution to the felt and set it aside.

Note: You want to do this first because you need to work quickly through the process.  Alcohol inks dry pretty fast (especially the markers) so make sure you have everything ready to go.


Next, I started with my lightest color (BT5) and colored the top of my glossy cardstock. (You will see in the picture below that I already completed the other half of my piece.  It's important to work in small areas so the ink stays wet so it is easy to blend).  I like to use the chisel tip because you can cover a larger area faster.


Next, I colored another section of my glossy cardstock with BT6.  Again, work quickly.


And finally, I added BT9 to the middle section.  So it's not looking so fabulous right now... so take the applicator with the blending solution on it and start dabbing away.


Then, while the blender solution is still wet, scribble some of the TB9 (dark blue) on the panel) and then dab again and smear it all in with your applicator.


You can go back in and add any of the colors again and dab with blender... do this as much as you want until you get the look you want.


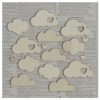
Once my piece was dry, I stamped my images using black ink and and assembled my card.

Note: Make sure you have your work surface covered with something other than paper (the ink will go through).  Also, I like to wear rubber gloves & an apron, since this process can be a little messy.

Stay tuned next week for one more tutorial with another Spectrum Noir Background technique.

Thursday, July 24, 2014

New from Sheena Douglass!

Fun stuff today!  Next week, Crafter's Companion will be releasing a new collection of Chrismtas Stamps from Sheena Douglass.  This large sentiment is from the Season's Greetings stamp set.  I also used a background set from Stamp-It Australia called Overlapped Text.

To color my image, I used my Spectrum Noir Markers - CR11, DR7 and then added some gold Stickles to the center of each flower.  For the pattern paper, I printed it from the Vintage Christmas CD-ROM.  This elegant card was super fast and simple to put together & will be very easy to pop in the mail.


Have a great day!

Wednesday, July 23, 2014

Taylored Expressions and Perfect Papercrafting HOP!


Today I'm taking part in a fabulous partnership with the Taylored Expressions Baker's Dozen and Perfect Papercrafting!  Have you heard about their phenomenal rulers that make creating perfect layers a breeze?  
If you haven't, then you're in for a treat. Create everything from a 1/16" border to 5/8" without having to do any measuring math! You can find all of their product videos here!   For my card today, I am using the Perfect Papercrafting Ruler & Self-Healing Mat and I have to say... I have a new favorite ruler!!!  


The fabulous ruler has a metal edge on one side with an orange bar in the middle & when you push down on the bar, it holds the ruler and your paper in place while you cut.  BRILLIANT!


I used their Self-Healing Mat along with the ruler & made a perfect cut!


This photo shows the gripper on the bottom of the ruler.


Thanks so much for the lovely product Perfect Paper Crafting!


Now HOP on over to see what Jenny Peterson from the Perfect Paper Crafting Team came up with today!  And for more great ideas, check out the Perfect Paper Crafting Blog.

Supplies Used:


Tuesday, July 22, 2014

Tutorial: Spectrum Noir Ink Refills & Gina K Designs {Part 1}

Hi Peeps!  I'm here today to share a fun tutorial using my Spectrum Noir Ink Refills along with this fun Gina K Designs set called Ship to Shore.    Here's the finished projects... scroll down for the picture step-by-step tutorial.


I started with 3 shades of blue ink refills (BT5, BT9, TB9), a bottle of Spectrum Noir Blender Solution, a piece of glossy cardstock, and an applicator with felt.


I use the Tim Holtz applicator and just cut scraps of white felt to go on top. I added several drops of blender solution to the felt and set it aside.

Note: You want to do this first because you need to work quickly through the process.  Alcohol inks dry pretty fast so make sure you have everything ready to go.


Next, I started with my lightest color (BT5) and using the dropper that comes with the bottle, I squirted droplets of ink all over the glossy cardstock.


Then I added the droplets of the next two colors (BT9, TB9).  Finally, I took my applicator (with Blender Solution on it) and dabbed it all over the glossy cardstock.


Just keep dabbing it until you get the look you want.  If you have too much ink, put a new piece of white felt on your applicator with more blender solution and then dab it some more.

Note: Make sure you have your work surface covered with something other than paper (the ink will go through).  Also, I like to wear rubber gloves & an apron, since this process can be a little messy.


After the piece was dry, I used an embossing folder to add some texture to the water.


While you've got your supplies out, make lots of background pieces.  You'll get new results with each piece & it's fun to experiment with different color combinations!

I'll be back later in the week with more Spectrum Noir Background techniques.
Blog Widget by LinkWithin
 
Blogger Template By Designer Blogs