Friday, August 29, 2014

Crafter's Companion is going Trick or Treating!

So excited to share the FIRST EVER Halloween Release from Crafter's Companion!  WOOHOOO!  I love creating goodies for Halloween ~ along with Valentine's Day, it's one of my very favorite holidays.


Supply List:
Crafter's Companion Halloween Release - Trick or Treating
Spectrum Noir: CT3, CT4, OR1, OR3, LV2, CG3, IG5
Embossalicious Folders: Petite Dots; Deco Swirl
Die'sire Decorative Die: Enchanted Spring (inside piece, cut twice)
Die'sire Essential Dies: Circle, Scallop Circle

Thursday, August 28, 2014

Always Autumn Tutorial for Gina K Designs

Happy Thursday Friends!  Today is a fun day because I am not only sharing a new Gina K/Spectrum Noir tutorial... BUT, there is a new Gina K release!  WOOHOO!  I totally ADORE this new set called Always Autumn.  It is just gorgeous.  For my card today, I am using two of the flowers and one of the sentiments from the set.  Check out how I colored my flowers...


First I stamped my images on smooth white cardstock with Memento Tuxedo Black ink.  Then I picked one of my favorite Spectrum Noir color combinations ~ GB1, GB3, CR1 & CR7.


Next, I started coloring a few petals of the flower with GB1 and then added some GB3 along the edges and in the center.


Then I added more GB1 over the top to blend the colors.  Note: I work in small areas so the inks stay wet and blend well.


Keep repeating those steps, a few petals at a time.


Next, I added some CR7 (Coral/Red), on the edge of the petals (a few at a time).


And added CR1 over the entire flower petal for a pretty peach look.


When I finished the entire flower, I added GB1 to the entire flower so a bit more yellow would pop out.


For the flower center, I used CR1, CR7, CR8, and CR11


Next, I added some orange and dark yellow Spectrum Noir Blendable Colored Pencils along the edges.


Here are my finished flowers!
Up close you can really see the different colors pop off the petals.


Stay tuned... I'll have a few more tutorials coming up next week ~ one with a background using the Spectrum Noir Markers and one for coloring pumpkins!

Wednesday, August 27, 2014

Taylored Expressions: Circle Showcase and Little Bits!

Ready for a mid-week break?  Sit back and take a peek at what I've got for you today!  This month, the designers at Taylored Expressions are highlighting this fabulous Circle Showcase Die this month along with the fun collection of Little Bits Dies!  They work perfectly together!!!


I decided to pair up the Little Bits Flowers and Stems dies to go with my Circle Showcase Die.  I stamped the background pieces with the Pockets & Pages Journaling Graph Stamp to add a little texture.   The sentiment is from the Greetings for Her set.  I just love how this card turned out!


Thanks for buzzing by today!


Supply List:


Tuesday, August 26, 2014

friendship is the sweetest flower...

Hi Everyone!  I hope your week is starting off well!  This past weekend I had some time to pull out these pretty dies from Crafter's Companion.  They are the Die'sire Essentials Flowers for all Occasions dies and they are so much fun to use.  I also added a sentiment to my card from the new Sentimentals set called Nature.  I love the bright colors with the pop of black in the pattern paper and sentiment.  


Have a Happy Day!

Monday, August 25, 2014

Create-A-Card Christmas Village Die

Happy Monday Everyone!

Today I have a card featuring a new Die'sire Create-A-Card Christmas Die called Christmas Village from Crafter's Companion.  I used the bottom part of the 6x6 die with Silver Starlight Shimmering Cardstock and then ran it through my eBosser again after I cut it so it would emboss.  Then I rubbed Antique Linen Distress ink over the top so the embossed sections would pop.  The black snowflake background was made with the Black Pearl Shimmering Cardstock and embossed with the Let It Snow Embossalicious Folder.  The sentiment was added from the Vintage Christmas Sentimentals set called Home for Christmas and trimmed with the Cameo Stamping Frame.


Have a great Monday!

Friday, August 22, 2014

More Pretty Purple Flowers with Gina K Designs!

Happy Friday!  Earlier this week I shared a tutorial coloring some flowers with this fantastic Dogwood & Butterflies set by Gina K Designs and Spectrum Noir markers and Blendable Colored Pencils.  Today, I have another card using the same technique, just with a different image from the set.  If you missed my tutorial... take a peek HERE.


Have a great weekend!

Thursday, August 21, 2014

Taylored Expressions: Flowering Tree

Hi Friends!  I have a bright and happy card to share today using some great stamps and dies from Taylored Expressions.


The set I used is called Sunshiny Day and then I added lots of little details using the Grass Border, Little Bits Flip Flop Dies, Clip It On dies, and the Bloomin' Stacklet 2.  (Links below)


I hope you have a sunshiny day!


Supplies Used:


Wednesday, August 20, 2014

Pretty Purple Flowers ~ Spectrum Noir/Gina K Tutorial

Hi Everyone!  I'm back today with a new tutorial for 
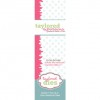
Gina K Designs and coloring with my Spectrum Noir Markers & Spectrum Noir Blendable Colored Pencils.  This time I selected the pretty 
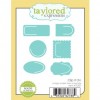
Dogwood & Butterflies stamp set and some beautiful shades of purple ~ I know Dogwood flowers aren't really purple, but the flower shape fit perfectly with what I wanted to show today. 


To begin, I stamped several of the images from the set with Memento Tuxedo Black ink on Spectrum Noir Ultra Smooth cardstock.   I also pulled out my Spectrum Noir Marker color chart to decide which colors to use on my project.  I selected HB1, HB2 & HB3.


I began coloring the large flower image and used the HB3 marker on the shaded areas of the first petal.  It is important to work in small areas so the markers stay wet and will blend.


Next, I added HB2 to fill in the spots below and HB1 for the center of the petal.  In all honesty, I was not thrilled with the result of the blending, AT ALL!


I decided to stamp out a "test" image on another piece of cardstock and play a bit with the colors since I wasn't happy with my first attempt.  NOTE: It's really important that you don't get frustrated if your color palette isn't working the first time.  Just try adding some new shades, even if it isn't in the same color group.  For my image, I added some LV1 to the HB1-3 and a little bit of #82 (purple) Spectrum Noir Blendable Colored Pencil to my petal.  Then I blended it with some Gamsol & a paper stump.  I was much happier with that end result.


Now I'm back to my original flower, I added the LV1 and a bit more HB3 to the edges.  I'll add the Blendable Colored Pencils when all of the petals are done (see below).


Now that I have the colors that I really want, here is the step-by-step for on the second petal.  Starting with HB3.  I just went along with the black shading marks that are on the image.


Next I added the HB2, just above the HB3 and overlapping slightly, but not coloring the center part of the petal.


Next, I added the HB1 in the center and I also went over some of the other colors to blend as much as possible.


Finally, I added the LV1 which is a pretty lavender color and blends beautifully with the HB color family.


Once all of the flower petals were colored, I added the Spectrum Noir Blendable Colored Pencils (79, 80, and 82).  Then I used Spectrum Noir Gamsol & Paper Stumps to blend the colors.


This flower shows the difference with/without pencils and also the pencils not blended with Gamsol.  The petal on the left has 3 shades of pencils and is blended with Gamsol.  The top petal has pencils but is not blended, and the petal on the right and bottom don't have any pencils added.


Next up, the leaves for the flower.  Once again, I went to my "test" image to see how I wanted to color them.  I selected DG2 and DG4.  As you can see, there is a big color difference.  Hmmm.... how do you solve this dilemma?  No worries, keep what you have and do some "Pallet Blending"!


Here is a list of the colors I've been using and as you can see, the DG3 is not really the shade I want to go with DG2 & DG4.   I solve this by doing some "palette blending" of the 2 shades I'm using (see the bottom color).


How to do Palette Blending: First find something with a slick surface (a ziplock bag, an acrylic stamping block, a sheet of acetate ~ any of these work.  Next, take your darkest color (DG4) and scribble some color on the slick surface.


Then take your lighter color and "pick up" some of the dark color on the marker.


Using the colors you have already put down, work from the bottom of the leaf (darkest part) toward the outer edge (lighter part) and the colors will begin to blend as the darker color runs out.


As a final touch on the leaves, I added some Spectrum Noir Blendable Colored Pencils (58, 59, 60) on each leaf.  Then I used Gamsol and Paper Stumps to blend the colors.  And there is the finished flower!


I hope you enjoyed the tutorial and don't afraid to experiment a little and test out colors you weren't expecting to use.  You might just come up with a totally unexpected color combination that is now your favorite!
Blog Widget by LinkWithin
 
Blogger Template By Designer Blogs