Thursday, June 30, 2016

Project Life ~ The last few pages

And so I come to the end of this fun trip!  It really was amazing and I had so much fun putting this Project Life album together in the PL App.  I'm going to add a few more pages to the album to include the items we collected along the way... postcards, maps, ticket stubs, etc.   Here are the last few pages in our album of while we were on the ship.


the least favorite day on the cruise ship... let's start all over!


Have a great day &
thanks for joining me on this amazing trip!

Tuesday, June 28, 2016

Project Life ~ Rome {part 2}

Ahhh... Roma ~ Ti amo!
What more can I really say about it?  It's a spectacular city!!!  
I will be forever grateful for being introduced to this amazing city.
Thank you Richard for sharing your love of Roma with us.

{Click on the pages below to read the journaling}


Piazza Novona!


Bumping into friends from home... IN ROME!

I hope you enjoyed the tour today!

Monday, June 27, 2016

Project Life ~ Rome {part 1}

Hi Friends!  I am continuing on with our trip from 2014 & today we are in Rome!  Our family loves to travel and Rome is one of the places we absolutely LOVE!  The rich history is laid out right before your eyes, the food is delicious and abundant, and the Italian culture is like none other.  We have been fortunate enough to have been to Rome on three different occasions, and it really is a place I can see us returning to again some day.  {Click on the pages below to read the journaling}


Our favorite outdoor market!

Our home away from home...


I'll be back tomorrow with Rome ~ Part 2!


Thursday, June 23, 2016

Gina K Inspiration Hop!

Hi there friends!  I have a new 
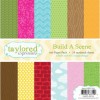
Gina K Designs tutorial to share; however, this time, I'm using the Zig Clean Color Real Brush Markers on my project along with the new stamp set called We Go Together.  


Step 1: Stamp the images using Black Staz On ink and watercolor paper.  Trim the images with scissors.

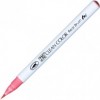
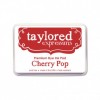
Step 2: Select a darker shade of pink (I used Peach Pink) and add color directly from marker to watercolor paper around the edges of the doughnut.


Step 3: Next, add a lighter shade of pink (Sugared Almond Pink) to the inside areas of the image.  Leave some white space for shading.


Step 4: Using a waterbrush, blend the two shades of pink together.


Step 5: For the coffee cup image, add Sugared Almond Pink to both edges of the coffee wrapper and blend with a water brush.


Step 6: Trim the wrapper and attach it to the coffee cup stamped on Kraft.


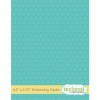
Step 7: Stamp a background using the Tiny Textures Stamp Set and Kraft ink.  Add both images to the card and then add glitter to the watercolored areas.


A close up of the colored images.


I hope you find some sparkle in your day today!

Tuesday, June 21, 2016

In the Dog House!

Isn't it fun when we get sweet little cards from our four-legged fur babies?  My husband always gives me cards from the dogs and I love it!   I made this card with that in mind using the Tanner Stamp & Die Combo set from the adorable Pawsitively Purrfect by Taylored Expressions.


In addition to this super cute stamp set, I used the new Build A Doghouse die set, the Frame in Frame 2 Cutting Plate, Picket Fence Border and Build A Scene - Rolling Hills to create this fun backyard scene.


Have A Fabulous Day!


Supplies:

Monday, June 20, 2016

Project Life ~ A Day in Florence

I can't believe it has been two years since we took this trip ~ and about two years to the day that we were here in Florence!  It was such an incredible trip and we really enjoyed this beautiful city!!   We packed so much into this day... click on the pages to enlarge them to read my journaling.


What a view!


The David!


Out & About


HANDS DOWN... THE BEST GELATO IN THE WORLD!
{Funny story... My daughter and I tracked down this place again last year, because we loved it that much.  We didn't even have the address, we just knew a general location}


I hope you enjoyed my little tour of Florence!

Thursday, June 16, 2016

Congrats to the Graduate!

I've been making TONS of graduation cards this season and hey look... I make more than just green grad cards!  LOL!  


For my card today, I used the Graphic Greetings - Graduate stamp and paired it up with the Tag Stacklet 1 dies and the new Honeycomb & Chevron Embossing Folders!


Thanks for stopping by!
Blog Widget by LinkWithin
 
Blogger Template By Designer Blogs