It's my favorite crafty week each month... the Taylored Expressions Sneak Peeks and Release for October! It's always such fun playing with the fabulous products TE releases each month & this month is extra awesome because it is filled to the brim with Christmas goodness!

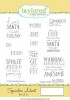
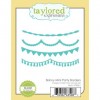
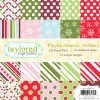
My first card to share has one of my favorite crafty color combos ~ Toffee, Cupcake & Sugar Cube! I used the beautiful new Snow Day Background stamp and inked it up in the Sugar Cube ink on the beautiful Cupcake cardstock and then heat embossed it with white embossing powder. I added a scene from the new Do You Wanna Build a Snowman? die using TE Shimmer White Cardstock. I trimmed it down to fit the panel and then I added a Build A Scene Rolling Hills piece over the top. The patterned paper is from the new TE 6x6 Paper Pack - Playful Patterns Holidays and then I used the Stitched Scallop Edger die as a border. The Sugar Cube heat embossed sentiment is from the Sparkle and Cheer stamp set. {see product links below}

Supplies for Pink Merry Christmas:
 |  |  |  |  |
 |  |  |  |  |
InLinkz.com
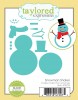
Next up, I decided to make a coordinating card this time using the new Snowman Shaker Die, the Little Bits - Santa Hat, and the Snow Day Background Stamp.
Next up, I decided to make a coordinating card this time using the new Snowman Shaker Die, the Little Bits - Santa Hat, and the Snow Day Background Stamp.

I assembled my sweet little Snowman Shaker using Sugar Cube cardstock, Clear Sheets and the new TE Snow Flurries Sequins inside. Then I trimmed and added his cute little face and accessories from the additional dies in the set. Rather than using the top hat that came in the set, I added the Little Bits - Santa Hat and then embossed the hat and scarf with the Cable Knit Embossing Folder. It would also look fabulous embossed with the new Plaid Embossing Folder (which I thought of as I was taking the photo of my card). For the background on my card, I used the new Snow Day Background Stamp and stamped it in Sugar Cube and then heat embossed it with Clear Embossing Powder and framed it up with the Frame in Frame 2 Cutting Plate. {Product Links are below}

PRIZE ALERT: Check out my Facebook Page for a special treat!!!
Taylored Expressions is celebrating Release Week with some fabulous giveaways! Visit the TE Blog each Sneak Peek Day this week to answer Taylor's Question of the Day for a chance to win a prize from the latest release.

All of the new products being shown today will be released Thursday, October 6th! You won't want to miss out on what the designers have been working on for today's sneak peeks ~ links for today's designer list is on the Taylored Expressions Blog. Don't forget to leave a little love along the way!
Supplies for Snowman Shaker Card: