Showing posts with label Zig Clean Color Real Brush Markers. Show all posts

Sunday, December 31, 2017

New Years Eve ~ Happy Birthday!

Earlier this month I sat down and made some birthday cards which I hadn't done in almost a year!  Considering that I used to make an average of 10 cards per week for design teams prior to this year, that was a pretty big drop off for me. However, I still can't bring myself to buy cards at the store, so I sat down and created a few. 

For these two happy cards, I used some of the Taylored Expressions watercolor panels & colored them with my Zig Clean Color Waterbrush Markers.  


Wishing You a Very Happy New Year!

Tuesday, December 13, 2016

Gina K Inspiration Hop ~ Day 2

The Cast and Crew for Gina K Designs welcomes you to another fabulous blog hop celebrating the new stamp release for December by our illustrator team! We hope to inspire you with some beautiful card projects as you hop along to each of the designer’s blogs! Today, we are featuring the stamp sets by Beth Silaika and Claire Brennan.

These stamp sets are so fun and versatile! You will be able to create amazing card projects using each individual set or by combining the images and sentiments from multiple sets from this release. Have fun and be creative!

Enjoy the gorgeous inspiration samples from the team and then comment on each blog for your chance to win a $20 Gina K Designs gift certificate! To see who won, check the Big News Forum at StampTV a few days after the hop. Ready for some inspiration?

I made this colorful card using the adorable Xavier Zebra set by Beth Silaika ~ as you can see, it also has this fabulous toucan.


Step 1: Stamp the image in black ink on watercolor paper.
Step 2: Color the majority of the bird's body with the Light Blue Zig Clean Color Waterbrush marker.


Step 3: Add streaks of Cobalt Blue directly from the marker.


Step 4: Use a waterbrush to blend the colors.  Add more ink from the marker as desired.


Step 5: Add Yellow Green ink to the top of the bird.


Step 6: Add streaks of Light Green to the bird & blend with a waterbrush.


Step 7: Add Yellow ink to the eye & bottom of the beak.


Step 8: Add Orange & Bright Yellow to the top of the beak.  Blend with a waterbrush & add more ink as desired.


Step 9: Next color the leaves on the vine with Yellow Green & Light Green markers.  Blend with a waterbrush.


Step 10: Repeat with the same colors on the leaves.


Finished close up ~ I kind of like the messy watercolor look of this.


and a chart of the colors I used


Ready for more awesome creations? Just click on the links below for more from Gina and the Cast & Crew:


Don’t forget to pop over to the Gina K Designs Store and check out all of the new products available this month in the “What’s New” section.


Thank you for stopping by!

Monday, December 12, 2016

Gina K Inspiration Hop ~ Day #1

The Cast and Crew for Gina K Designs welcomes you to another fabulous blog hop celebrating the new stamp release for December by our illustrator team! We hope to inspire you with some beautiful card projects as you hop along to each of the designer’s blogs! Today, we are featuring the stamp sets by Melanie Muenchinger and Theresa Momber.

These stamp sets are so fun and versatile! You will be able to create amazing card projects using each individual set or by combining the images and sentiments from multiple sets from this release. Have fun and be creative!

Enjoy the gorgeous inspiration samples from the team and then comment on each blog for your chance to win a $20 Gina K Designs gift certificate! To see who won, check the Big News Forum at StampTV a few days after the hop. Ready for some inspiration? 

Here's the project I made with Theresa's set called Winter Trees.  I also included a tutorial for coloring my image with the Zig Clean Color Real Brush Markers.


Step 1: Stamp image with white pigment ink and heat emboss with white embossing powder on watercolor paper.

Step 2: Using the Zig marker in Haze Blue, apply ink from the marker to the sky.


Step 3: Using a waterbrush, blend the ink color.


Here's what mine looked like after I did the blending.


Step 4: Add a darker blue (Shadow Mauve) to the corners and edges of the trees.


Step 5: Once again, blend with a water brush.  Add more ink if needed.


Step 6: Add Emerald Green and Green ink to a palette, and use a waterbrush to apply to the trees and ground.


Step 7: Using a water brush, add just a little bit of English Lavender to the sky.


Here's a close up of the watercoloring and I added a touch of Stickles to it.


The colors I used and a close up.


Ready for more awesome creations?! Just click on the links below for more from Gina and the Cast & Crew:


Don’t forget to pop over to the Gina K Designs Store and check out all of the new products available this month in the “What’s New” section.


Thank you for stopping by!

Monday, October 17, 2016

Gina K Christmas Inspiration Hop Day #1 ~ Coloring with Ink Pads

The Cast and Crew for Gina K Designs would like to welcome you to another fabulous blog hop celebrating the new Home for the Holidays StampTV Kit.  In the coming days, we will also feature a number of gorgeous stamp sets by our illustrator team! We hope to inspire you with some beautiful card projects as you hop along to each of the designer’s blogs!  

Enjoy the gorgeous inspiration samples from the team and then comment on each blog for your chance to win a $20 Gina K Designs gift certificate! To see who won, check the Big News Forum at StampTV a few days after the hop.

My first card features the Home for the Holidays Stamp set in the Stamp TV kit.  I also used the coordinating dies, patterned paper, and cardstock that all comes with this amazing kit.

My next card features the 
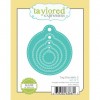
Music Background Stamp from the kit along with the snowflake stamps & Dies from the Home for the Holidays set and a sentiment from the Holiday Frame set that I will feature tomorrow.


My final project today is a fun Christmas tag using the Home for the Holidays set along with a tutorial on how I colored and then fixed a coloring mistake ~ ;)


Step 1: Trim cardstock tags (Jelly Bean, Kraft, Red Velvet), stamp the background with a small snowflake using the same color ink, and then add coordinating patterned paper from the kit.

Step 2: Stamp the mitten image on watercolor paper with black pigment ink and heat emboss with clear embossing powder.


Step 3: Using a water brush and the Turquoise Sea Gina K ink pad, color the mittens taking the ink directly from the ink pad.


Step 4: Using Zig Clean Color Real Brush Markers in Geranium Red and Turquoise Green, color the hearts and stripe on the mittens.  Use the Turquoise ink pad to color the top of the mitten.


OOPS!

Step 5: When you mess it up and you can't recover no matter how much water you add, stamp it again... recolor!  :)  Yup... it happens to everyone.  I didn't want to start over completely, so I decided to show you how I fixed my little boo boo.   The second time I stamp it, I colored the light blue first then added the red on the hearts.


Step 6: I trimmed just the pieces I needed and covered the mistake.  You can't even tell!


And here is the finished piece.


Ready for more awesome creations? Click on the links below for more from Gina and the Cast & Crew:


Don’t forget to pop over to the Gina K Designs Store and check out all of the new products available this month in the “What’s New” section at Gina K Designs.

Tuesday, October 11, 2016

Taylored Expressions: Watercoloring for Christmas

Christmas is just around the corner and in the crafting world, it comes even quicker.  This month the Taylored Expressions designers are highlighting watercoloring for Christmas.


I decided to go with another unconventional color combo with the pretty Poinsettia Bouquet set and the Zig Clean Color Real Brush Markers. {links below}


Have a wonderful day!


Supplies:


Sunday, October 2, 2016

Taylored Expressions Pretty Perfect Birthday Cards

I know it's Sunday and I usually don't post much on the weekends, but I wanted to share these pretty little package sized birthday cards I made today with the Taylored Expressions 3x4 Watercolor Panels - Birthday.


I used the Zig Clean Color Real Brush Markers and a water brush to color these lovely pre-printed images.  Then I just backed them with cardstock and VOILA!  Easy Peasy Birthday Cards perfectly sized to add to a package or gift bag!  I just love the bright, cheery colors after so many dreary days of rain here in Indiana.


Taylored Expressions sneak peeks for the October Release begin tomorrow, so make sure you check in so you can see all of the fun new things we're going to share.

Taylored Expressions Supplies:


Blog Widget by LinkWithin
 
Blogger Template By Designer Blogs