Hi Friends! I'm back today with a few more cards and a tutorial with the new Stamp TV Kit by Gina K Designs. The kit is called Made with Love and it's AWESOME! It's one of my favorite Stamp TV kits EVER and I'm sure it's gonna sell out before long! If you missed my tutorial from Monday, check it out HERE.
I used the beautiful butterfly from the Made With Love stamp set and I added sentiments from the new Incentive Set from Gina K called Massive Messages ~ it's free with a $75 purchase. Today I want to show you two different techniques using the Spectrum Aqua Markers. The great part about using watercolor markers is that they are very forgiving. If your shade is too dark, add some water. If the shading is too light, add more color.
I used the beautiful butterfly from the Made With Love stamp set and I added sentiments from the new Incentive Set from Gina K called Massive Messages ~ it's free with a $75 purchase. Today I want to show you two different techniques using the Spectrum Aqua Markers. The great part about using watercolor markers is that they are very forgiving. If your shade is too dark, add some water. If the shading is too light, add more color.

Step 1: Stamp image in Staz-On Jet Black Ink on watercolor cardstock.
Step 2: Select coordinating shades of Spectrum Aqua Markers ~ Bud Green, Aquamarine, Teal & Peacock Blue ~ and scribble the ink on to a paint palette directly from the marker.

Step 2: Using a water brush, add some Peacock Blue to areas of the butterfly.

Step 3: For some contrast, add a lighter blue ~ Aquamarine to the same areas.

Step 4: Add Bud Green with the waterbrush.

Step 5: Mix in some Teal

Step 6: Next I added Aquamarine to the remaining areas directly from the marker.
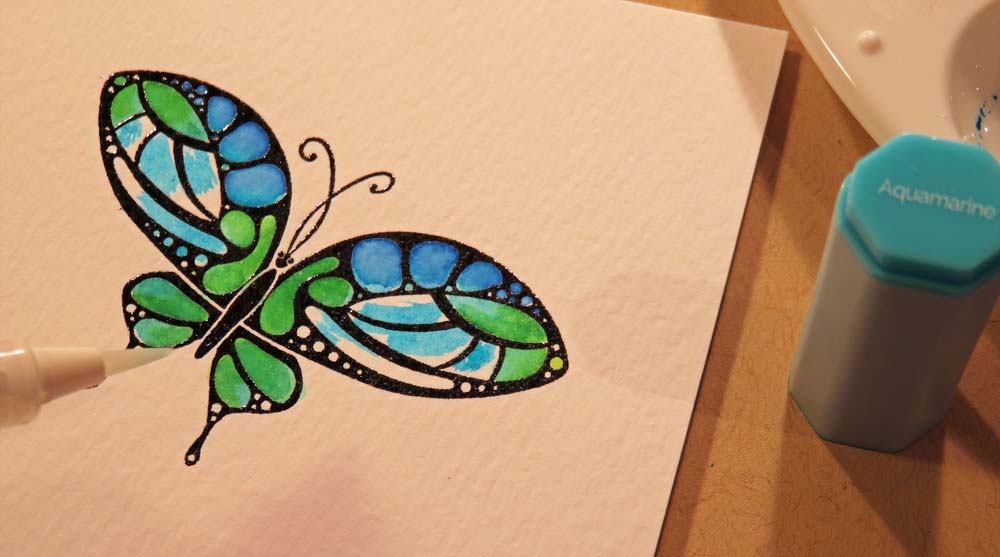
Step 7: Use the waterbrush to blend everything.
TIP: If the colors are too dark, dab with a paper towel while the colors are wet.
This is how my butterfly came out... I'm sure if I did it again, it would turn out differently. Just play and experiment.

For the next technique, I used the same butterfly and the same colors.
Step 1: Use the Teal Spectrum Aqua Marker and add color directly to the stamp.

Step 2: Next add Peacock Blue to some of the outside lines.

Step 3: Add Bud Green to the rest of the open areas.

Step 4: Spritz the image with water & stamp on watercolor paper.
TIP: Spectrum Noir Watercolor Cardstock is my favorite cardstock to work with for watercolor products because it is thick so it holds up while working with water and colors. It is perfect for blending.

Step 5: Using a waterbrush, blend the colors on each area of the image.

The finished butterfly...

Don't worry if your butterflies don't look just like mine... they come out different every single time & that's the fun of watercoloring.... there are no rules!


1 comment:
Your cards are eye catching. Thank you for the tutorials which are greatly appreciated!
Post a Comment