Later this week, Crafter's Companion will be coming out with a brand new product called The Big Score. It is an extended size scoring board that is perfect for making large boxes and projects. Today I am sharing a fun project call the Picnic Box.

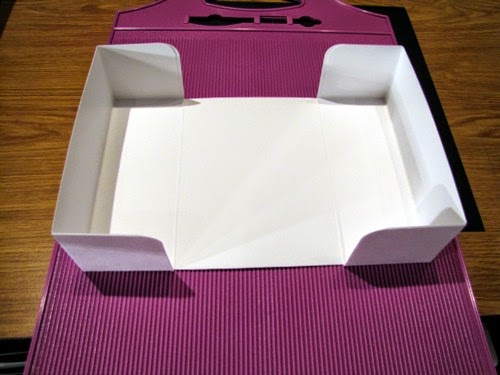
Here is the finished box opened

Here's how she made this cute box...
Step 1: Gather a ruler, cutting blade or scissor and our 12"x 16" Construction Cardstock.

Step 2: Trim the Construction Cardstock so the size is 11 3/4" x 15 1/4".

Step 3: From the top left edge of the board, place the shorter edge of the cardstock along the left side. Score the cardstock at 2 1/2" and 5 1/8".

Step 4: Turn the cardstock to the other shorter edge (180 degrees) and score again at 2 1/2" and 5 1/8".

Step 5: With the long edge of the cardstock against the left side of the board, score at 2 1/2". Turn the cardstock around (180 degrees) and score again at 2 1/2".

Step 6: From the RIGHT edge and using the numbers at the bottom of the board, score just inside the lines in the center of the box.

Step 7: With scissors or a cutting blade, trim between the center scored pieces and discard.

Step 8: Cut V-shaped notches from the outside flaps.

Step 9: Use a corner rounder on the outside flaps. This will give your box a finished look. Note: If you are using Construction Cardstock, you will need to use a heavy duty corner rounder.

Step 10: Folder and burnish the scored lines & apply strong adhesive to the flaps.

Step 11: Using your finger as a guide across the top, carefully attach the flaps.
Step 12: For the inside base box , trim a second piece of Construction Cardstock to 9 7/8" x 11 1/2". Note you may also use 12x12 cardstock.
Step 13: Using the right side of the board and the numbers across the bottom right, score the board all the way around at 2 1/2".

Step 14: Cut V-Shaped flaps and apply adhesive.

Step 15: Attach the flaps of the inside box.

Step 16: Attach the box to the inside of the picnic box with adhesive.

Once the box is attached inside, the box will open and close.

Step 17: Trim two 1" x 12" pieces of cardstock for handles and secure them with brads. Then decorate as desired. Kendra used paper from the Sweet Treats 11x17 Card Pack to dress up her sweet picnic box.
Make sure you keep checking here on our blog, visit our Facebook page, follow us on Twitter and on Pinterest for more sneak peeks, inspirations, and news!


No comments:
Post a Comment