Sunday, November 30, 2008

OCL at IHP!

Say what? OK ~ the translation is: Our Craft Lounge stamps are now available at i{heart}papers! Woohooo ~ what a match! These high quality stamps are available in Crafty Cling (rubber with EZ Mount cling) or Crafty Clear stamps (depending on the set) and they both stamp beautifully!

The names of these sets are Pat the Dog & Pat the Good Dog ~such fun sentiments and images. The little doggie behind sticking up in the air just cracks me right up!

I matched these fun sets with some great paper by Sonburn Designs, which are also available at i{heart}papers.

Supplies from i{heart}papers:

Saturday, November 29, 2008

Our Craft Lounge ~ Spring Flowers

Here are some lovely little flowers from a set called Spring Flowers by Our Craft Lounge. There are some wonderful images in this set ~ several flowers, a butterfly, snail, and some sentiments. It will also be perfect for scrapbooking!

Short & sweet today... see you tomorrow!

Supplies Used: Stamps ~ Our Craft Lounge (Spring Flowers); Cardstock ~ SU; Pattern Paper ~ Heidi Grace; Ink ~ Palette & Copics; Ribbon ~ May Arts; Baubles; Trim ~ Doodlebug.

Friday, November 28, 2008

Inchie Friday ~ Happy Thanksgiving Weekend!

Happy Day-After Thanksgiving! I know I'm late today, but the pictures from YESTERDAY are hot off the printer. I just had to wait for some daylight to photograph the page.

Happy Inchie Friday! When I was planning my Inchie posts for this month, I knew today's post would be a Thanksgiving page. I actually made the page last week & planned out which pictures I wanted to take yesterday. I had a list of what size each block needed and which direction to take it. I wasn't thrilled with how many of my photos turned out, but I did manage to get a decent group shot.

My Inchie technique for today was to use a long fall border stamp from Lockhart Stamp Company across six white Inchie squares. I also used just a portion on one of the larger stamps on the Inchie square to bring the focus to the title and journaling.

It's super easy to stamp a border images across several Inchie squares. Just make sure your Inchies are lined up property, ink up your stamp & GO...

Make sure you use plenty of pressure to get a good and complete image ~ but don't rock your stamp or it will blur.

These are pretty easy to line up because the stamp in narrow. The block was also the same size as the squares, so centering the image was easy peasy...
Woohooo... that's it for my fall Inchie posts! Now I'm on to Christmas and winter ~ won't that be fun?

Supplies Used: white Inchie squres ~ Inchie Arts; Cardstock ~ Bazzill; Ink ~ Palette & Copics; Brads ~ American Crafts; Rub-ons ~ Making Memories; Stamps ~ Lockhart Stamp Co.

Thursday, November 27, 2008

Happy Thanksgiving...

Happy Thanksgiving!
I hope your day is filled with
family, fun and good food!


I found a few cards in my archives to share today.

My Inchie Friday post will be up tomorrow; however, it will be late. We will be traveling back home on Thursday night and I won't be able to print my pictures for my page until Friday morning.

Wednesday, November 26, 2008

Ten Easy Tips for Mass Producing Cards!

I needed to make 50 ~ Christmas party invitations & needed a cute but quick card idea. It had to be something I could reproduce easily and did not include too much coloring. I turned to the Splitcoast Stampers website, as I often do for inspiration. I found THIS adorable card using the Mr. Twister set by Stampin' Up! ~ thanks to Julie for the fabulous idea! Check out her BLOG ~ her scrapbook pages are gorgeous! So this is my version of Julie's card ~ I like how it turned out.

Are you making cards to send this year? I know many cardmakers who don't because it is too overwhelming. I also know many of you have probably already started working on your holiday cards. Today, I thought I'd share my tips for mass producing cards just to break-down the steps to save you some time. BTW ~ although these tips are great for this busy time of year, my tips would be useful any time you need to make a big batch of cards.

#1: Come up with your idea! Search website galleries, blogs, stamp company sites, catalogs, or magazines for inspiration.

#2: Once you have your idea, make sure you want to make it over and over again! YOU NEED TO LOVE IT!

#3: Determine how many cards you need. I keep my address list on a Word address label file & keep it updated throughout the year. When my envelopes are ready to go, I just print my labels and stick them on!

#4: Make a sample of the card idea ~ simplfy where necessary & make sure your measuresments are exact so they are easy to cut with your paper trimmer.

#5: Select easy tools to use, like punches. I love my Nestabilities; however, I don't really want to make 90 Christmas cards with 2 or 3 layers of Nestabilities. I would much rather punch out my items.


#6: Make the coloring easy or use solid image stamps.

#7: Make sure you have all the supplies you need ~ order if necessary.

#8: Cut all the pieces of cardstock.

#9: Stamp and color all of your pieces at once. It's much easier to stamp all of your images at the same time.

#10: Use an assembly-line process when you put them together.


Enjoy making your cards ~ or not! Make sure you come back and share your link with me so I can see what you made!

ETA: These cards were made in compliance with the Stampin' Up! Angel Policy that can be found HERE.

Supplies Used: All supplies are from Stampin' Up! (unless otherwise noted): Stamp set ~ Mr. Twigster, Snowflake Jumbo wheel; Cardstock ~ Riding Hood Red, Old Olive, Chocolate Chip; Pattern Paper ~ Ski Slope; Punches ~ Scallop Circle, 2 circle punches, scallop border; Ink ~ white pigment. Other Supplies used: Ink ~ Palette, Copic Markers, glitter pen.

Oh ~ I can't forget to mention that Kate over at i{heart}papers will be having a special Black Friday sale this weekend! A $10 gift certificate for every $50 spent (code 10FOR50) & Free Shipping on orders over $25!


Tuesday, November 25, 2008

Oh Holy Night ...

Here is a beautiful new set from Lizzie Anne Designs called Silent Night. With this first card, I really wanted to show a rustic side of the manger scene ~ after all, Jesus was born in a manger. The distressed edges and white ink help rough it up a bit. I also covered the entire ornament with glassy accents to make it look like glass.

Supplies Used for card #1: Stamps ~ Lizzie Anne Designs (Silent Night & Build-A-Bauble); Cardstock, ribbon, ink ~ SU; Nestabilities.

The second image really called for a simple card. I dry embossed the oval onto the white cardstock panel and then stamped the image and sentiment in gold and heat embossed with gold powder. It's a super simple design, but it was a bit tricky to set up. I like the clean look of it.

Once again, there is a free shipping special over at Lizzie Anne Designs ~ just use the coupon code SANTALOVESME.

Supplies Used for Card #2: Stamps ~ Lizzie Anne Designs (Silent Night); Cardstock ~ Papertrey & SU; Ink ~ Encore; Gold Detail Embossing Powder; Ribbon ~ Offray; Nestabilities.

Monday, November 24, 2008

Be Merry...

So here's a few easy Christmas cards & very little stamping included. I love this new paper from My Mind's Eye called Be Merry! It's from i{heart}papers (IHP) and it's so darn cute!

There are several different papers in the line, and in another week or so you'll be seeing them on more of them on my Christmas cards. I've come up with something fun and different this year that I'm excited about. If you know me and on my Christmas card list (or follow my blog) you know I try to come up with something a little different each year ~ this year is no exception. But you'll have to wait a bit longer to see them. I know...I'm a tease! This week there is more blog candy from IHP ~ this time around it's Lori & Tracy's turn. The blog candy everyone is picking out from IHP has been OUTSTANDING! So make sure you go enter.


i{heart}papers Supplies:
Snowflake Stamps ~ Hero Arts (Winter's Butterfly)
Pattern Paper ~ Be Merry (My Mind's Eye)
Nestabilities

Sunday, November 23, 2008

Fun with Felt...

This was one of those projects that didn't turn out the way I planned. You know how that goes!

I went to Michael's and found this red stiff felt because I wanted to use my new SU Sizzix basket die with it. The Sizzix die cut the felt perfectly; however, the assembly didn't go as planned. I got some white string to sew them, but that didn't work so I had to chop off the sides (because of the holes I made). So I just ended up sewing the front and back together with my sewing machine & adding the felt snowflake. I think they turned out cute ~ but not what I planned. I added some fun little chocolates & there ya go ~ a quick little gift.

Saturday, November 22, 2008

More Calendar Pages...

I'm so late today! I just couldn't decide what to post and I needed to plan ahead for my posts this week ~ so here I am finally.

I thought I would finish up showing the calendar pages I prepared for my last Stamp Club night. The girls loved it & now I have at least one Christmas present done. Now to get the rest done!

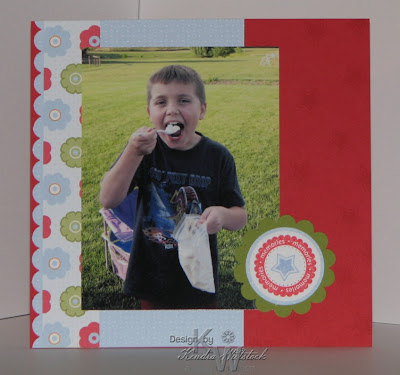
July's page is Matt eating homemade ice cream ~ we brought the supplies to do this with the kids this year & it was the perfect activity!

I know you keep seeing these pictures, but they are some of my favorites & I keep using them for projects.


I love this Haiku pattern paper from SU ~ so pretty!


Can't resist that spooky halloween paper from SU and those fun bat brads from Making Memories.


On this page I used the new fall paper from SU, a Lizzie Anne Designs set for the leaf border (In the Tree Top) & my friend Pine's set called Rustic Branches for the sentiment.

And last but not least, for December I used the new Christmas paper from SU along with the scallop border punch and Riding Hood Red.

So that's it for my first calendar this year. I have a few more to make & those will both have a theme of a very important Anniversary trip we took this summer with my husband's parents.

Have a Happy Weekend!

...And the winner is!


Tracey B who wrote yesterday for my Inchie Friday post ~ Thanks for showing how-to inch it:)

This fun little packgage of goodies will be arriving from Kate at i{heart}papers ~ woohooo! Tracey ~ I will be emailing you to get your information so we can get your package to you!

Thanks for playing everyone & keep looking for sweet treat ~ there will be more this coming week from 3 more DT members.

I'll be back later to share a project ~ I just can't decide what to put up today.

Friday, November 21, 2008

Inchie Friday ~ Thanksgiving Photo Blocks!

Quick reminder that today is the last day for blog candy ~ post until midnight (eastern time) & I'll post the winner tomorrow. (Blog Candy details are included in my posts from earlier this week).

OK ~ now on to my Inchie Friday creation for this week. You know by now that I LOVE coming up with new ideas for my photographs. These stamped images from Lockhart Stamp Company just scream fall, harvest, and Thanksgiving ~ so I really wanted to do a 3D photo project with them. Thus, the Thanksgiving photo blocks. So FUN! They can be used as place cards or just a fun fall decoration.


I found the wood blocks at Hobby Lobby for $.79 each. They are 1 1/2" cubes. On the top of each block, I printed out pictures of our family. Make sure you print images that you don't need to crop much. Otherwise the subjects faces will be HUGE. I printed mine off so 6 photos would fit on one 4"x6" piece of photo paper. I just had to trim off the bottom of each photo and they were perfect. I picked out 4 current photos (within the last year) for this project.

After I attached the photos to the tops of the blocks, I added some textured cardstock to the opposite side. For the names, I used white Inchie squares from Inchie Arts. I added the Itty Bitty checked border stamp and then used my small Hero Arts alphabet to stamp the names of each family member. I added these to the front of each photo block.

On the back of each block, again I used white Inchie squares and added the same border with the date of the photos/projects. Don't forget to add dates to your projects & pages. It's makes things so much easier through the years when you try to identify the details of each photo.

These great images are both Itty Bitty stamps and large stamps from Lockhart Stamp Company & I colored all with my fabulous Copic Markers.

To use a large stamp on the Inchie squares it's super easy. Included with the Inchie Papers by Inchie Arts, there is a little yellow 1" square of tinted acetate. This handy little tool is perfect for determining which area of a stamp will show up on your Inchie square.

The next step is to ink up your stamp and lay the stamp rubber side up on a flat surface. Then carefully lay your Inchie square on top of your inked stamp and press gently.


Voila! You have a great stamped image. It's amazing how capturing just part of the image makes it look totally different.

Just a quick note about the white Inchie squares ~ White Inchie Squares are made of the highest grade Alphamat Artcare museum quality preservation matboard. The material has a solid white archival core and is acid free and lignin free, as well as fade and bleed resistant making it a very desirable art surface. Because it is a bright white it is well suited for direct application of many different art mediums including rubber stamping, markers, colored pencil, watercolor paints, embellishment or collage materials applied to it's surface and sides.

Supplies Used: white Inchie squares ~ Inchie Arts; Cardstock ~ Bazzill; Pattern Paper ~ Pink Paisley; Ink ~ Palette & Copics; Stamps ~ Lockhart Stamp Company & Hero Arts (alphabet); Inchie tinted acetate (from the Inchie Papers pack); square scallop ~ Stampin' Up!

Thursday, November 20, 2008

A Silent Night...

Don't forget I'm having BLOG CANDY until tomorrow ~ Friday, November 21st at midnight (eastern time). Add comments to any of my posts and post as much as you like. Please include an email or blog address with your post so I can get in touch with you. I'll post the winner on Saturday, November 22nd. Thanks for playing! Go visit Loretta and Deb for their blog candy this week too.

Ttoday I have a few new Christmas cards to share with you. This is one of the Lizzie Anne Designs sets that was released this fall called Silent Night. It's a silhouette set & such a beautiful nativity scene.

These coordinating cards are both very simple to make and can easily be mass produced ~ isn't that what we all need during a very busy holiday season?

Don't forget ~ Now is a great time to purchase from Lizzie Anne Designs ~ they are running a special offer for November. All orders over $35 will have free shipping IF you enter this code HSFSNOV08.

Tomorrow is Inchie Friday ~ come on back and see what I've got going on. I'm super happy with how it turned out ~ Thanksgiving photoblock place cards...

Supplies Used: Stamps ~ Lizzie Anne Designs (Silent Night); Cardstock & Ink ~ Stampin' Up!; Pattern Paper ~ Lizzie Anne Designs; Nestabilities; Twine.

Wednesday, November 19, 2008

Lot's of sweets...

Well here we are again ~ Wednesday! How did that get here so fast?

Don't forget I'm having BLOG CANDY until Friday, November 21st at midnight (eastern time). You can add comments to any of my posts and post as much as you like. The candy will be sent directly from i{heart}papers after I've selected a winner. ONE RULE ~ you need to include an email or blog address with your post so I can get in touch with you. I'll post the winner on Saturday, November 22nd. Thanks for playing! Go visit Loretta and Deb for their blog candy this week too.

I'll have more Christmas cards coming up in the next few days; however, I don't have everything photographed and edited just yet. So here are a few more Our Craft Lounge cards that I made for the release last Friday!

This first card uses a Crafty Cling Rubber stamp set called Life is Sweet ~ and with this set, it sure is SWEET! I'm not sure you can see the brads I used but they have glitter on them. They are called Sugar Coated brads by Doodlebug ~ the perfect touch for this yummy card. I also thought this card fit in very well with my blog candy for this week.


This next card uses a Crafty Clear acrylic stamp set called Anna Mae. She is super cute and can hold a variety of object AND can easily change clothes and shoes. It's a super fun set!

Have a super day & don't forget to leave a comment some place on my blog to enter the blog candy drawing!

Tuesday, November 18, 2008

Christmas is coming...

First of all ~ Don't forget I'm having BLOG CANDY until Friday, November 21st at midnight (eastern time). You can add comments to any of my posts and post as much as you like. The candy will be sent directly from i{heart}papers after I've selected a winner. ONE RULE ~ you need to include an email or blog address with your post so I can get in touch with you. I'll post the winner on Saturday, November 22nd. Thanks for playing! Now go visit Loretta and Deb for their blog candy this week too ~ WOW! That's a lot of goodies ~ don't get a tummy ache!


OK ~ on with my projects for today! Can you believe how fast the holidays are approaching? I can't believe how fast this year has gone. Anyway, I made a few samples using
Rockin' Holiday by Lizzie Anne Designs. I love this Christmas set!!!

And if you need more inspirations ~ check out Santa's Card Making Workshop over at Lizzie Anne Designs. I mentioned it on my blog back in October, but now that we are in full swing with making Christmas cards ~ I thought I'd let you know about it again.

Now is a great time to purchase some of your favorite things from Lizzie Anne Designs ~ they are running a special offer for November. All orders over $35 will have free shipping IF you enter this code HSFSNOV08.
Blog Widget by LinkWithin
 
Blogger Template By Designer Blogs