Pages

Wednesday, December 30, 2015

TE: love is in the air

Hi There Friends!  I wanted to share another card from this month's Taylored Expression Release that I forgot to post earlier.   


I used the new stamp set called Love is an Adventure along with the Picture Perfect Valentine die set to make this cute shaker.  {supplies are listed below}


Thanks for stopping by today!


Supplies for Love Shaker:

Monday, December 28, 2015

Bebunni Just For You

Hi Friends!  Now that Christmas is over, it's time to move on from all of the Christmas projects.  I feel like I've been making them FOREVER!  Here's a sweet Bebunni card I made a while ago for one of the Crafter's Companion HSN shows & forgot to share it.  


Have a great day!

Thursday, December 24, 2015

Merry Christmas from our Family to Yours

Merry Christmas
from the Wietstock Family


I designed and printed these cards through Tiny Prints


Left to Right (top row): Family photo from our April Spring Break Cruise; in St. Croix; Tim & I (April); at Lucas Oil Stadium after Concord won the State Championship
Left to Right (bottom row): Matt, Matt & Meg, Meg (April); Meg & Kendra in Verona, Italy


Left to right: Family in St. Maarten (April); Megan graduation (June);
Matt playing at State Finals (November)


Wednesday, December 23, 2015

Christmas Bon Bon Box & Purse Box

Hi Friends!  Hope your holiday prep is going well and you are enjoying time with family and friends.  I have a few Christmas boxes that I made for HSN a few months ago and thought I'd share them with you.

My first box is a Bon-Bon Box.  It's super easy to make from a sheet of double sided cardstock. 


and here is a Christmas Purse Box...
Here is a the tutorial for it.

Merry Christmas!

Monday, December 21, 2015

Gina K Designs Inspiration Hop: Hippo Bird Day

The Cast and Crew for Gina K Designs welcomes you to another fabulous Inspiration Blog Hop! This blog hop is for our December Release!  We hope to inspire you with some beautiful card projections as you hop along in the hop this month!  Enjoy the gorgeous inspiration samples from the team and then comment on each blog for your chance to win an awesome grab bag of GKD goodies!!!  To see who won, check the Big News Forum at StampTV a few days after the hop.

For my card today, I used the sweet hippo from the new Hippo Bird Day stamp set illustrated by Beth Silaika.  Keep scrolling down to see how I colored this sweet little guy.


Step 1: Stamp the hippo and bird images on white cardstock.  NOTE: For this image, I used Memento Luxe Tuxedo Black pigment ink and heat embossed the image with clear powder.  I did this because I knew I would be putting down several layers of gray tones and didn't want to worry about the lines of the stamped image.


Step 2: Select the Spectrum Noir alcohol ink markers for coloring the images.  I selected the BG range (Brown Gray).  Colors shown below

TIP: I usually pick out the patterned paper(s) I want to use on my card first and then match my colors to it.

Step 3: Start with one of the darker colors in the palette and apply color the left edge of the image and the hippos ears.  I used BG5 to begin.  I also used FS7 & FS6 on the inside of the ears.

Note: Since this is a larger image, it is best to work in one area at a time so the ink stays wet and blendable.


Step 4: Using the next lighter shade (BG4), color the next part of the image making sure to go over the previously color to blend them together.


Step 5: Now add BG5 and then BG4 to the hippos front legs.


Step 6: Apply BG2 to the rest of the hippos body and front legs.  Make sure to go over the areas already colored so everything blends.


Step 7: After coloring the hippos body (see photo above), I didn't think the ears stood out enough.  Therefore, I added some darker tones so they would stand out a bit. (BG6 & BG5).


Step 8: Next begin working on the hippos face by adding BG 5 to the top and left edge and BG4 to color the rest of the small area.


Step 9: Using BG6, add color to the top & left side of the nose area.


Step 10:  Using the same technique when color the hippos body, I used BG5 & then BG4 to color the rest of the hippos nose.


Step 11:  I used BT2, BT3, BT4 to color the sweet little bird on the hippos back.


Step 12:  To ground the image, I decided to add some grass under the hippo.  I began with the GT1 marker with a brush tip.  (NOTE: all of the chisel tips on the second generation Spectrum Noir Markers can be switched out for brush tips)


TIP: I added the grass by starting each stroke from the bottom and then flicked my marker up toward the hippo.


Step 13: To add some shading to the grass, I added just a bit of GT2 color to my GT1 marker from tip to tip.


NOTE:  I am left handed, so I hold my GT1 marker in my left hand and my GT2 marker in my right hand while adding the grass.  When I need more color, I just add a bit more right from the marker tip.


Step 14: I used a BT4 marker to add color to clear rhinestones so they would match my card.

TIP:  When coloring rhinestones, you usually need to go with a darker color in the same color family so the color will show up.


Here's a close up of my colored image.


Ready for more awesome creations? Just click on the links below for more from the Illustrators and Design Team and leave some love along the way!!


Thank you for stopping by! Don’t forget to stop by the Gina K Designs Store to purchase these awesome stamp sets at http://www.ginakdesigns.com.

Friday, December 18, 2015

TE: Be Mine

Happy Friday!  I know we are all getting ready for Christmas, but in the crafting world we are always thinking a step ahead so today I have a pretty Valentine to share with you using the fun Graphic Greetings Valentine stamp Taylored Expressions.


I stamped the image and trimmed it out with the Heart Stacklet & backed it with the Stitched Heart Stacklet.  I also used the Hearts Cutting Plate and embossed the background of the card and added an additional sentiment from the Hearts A Flutter Cutting Plate.


Have a great weekend!


Supplies for Be Mine:


Wednesday, December 16, 2015

Easy Peasy Gift Wrap!

Happy Wednesday!  I hope your week is going well and your Christmas preparations are in full swing.  Last week I put together some fun little gifts for my Crafter's Companion designers & needed a fun packaging idea.  So I found these cute bags at Hobby Lobby and made tags to go with them using the Sentimentals - Season's Greetings stamp set.  I also used the Die'sire Scallop Tag die and the Nordic Christmas - Frosty Morning Embossing Folder.


Have a Great Day!

Tuesday, December 15, 2015

Tutorial: Spectrum Aqua Snowflake Tags

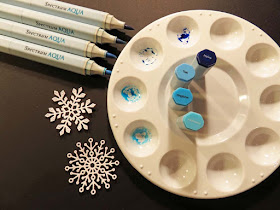
I need to find some time to start getting my Christmas packages wrapped & I love adding little hand made tags that match the packages.  These pretty little tags are from the snowflake dies and the sentiment from the Holiday Seasons stamp set by Gina K Designs.  Below is a tutorial on how I made the snowflakes with my Spectrum Aqua Markers.


Step 1: Trim the dies using Spectrum Noir Watercolor paper.


Step 2: Using a paint palette, scribble several coordinating colors in the ink wells.  I used Marine, Teal, Kingfisher, and Aquamarine.


Step 3: Using the lightest color, (Aquamarine) add color to the snowflake with a waterbrush.


Step 4: Next, start scribbling darker colors all over the snowflakes.  Just scribble away and add more color as desired.


Here is the first finished snowflake.


For the second snowflake, I decided to go with some darker tones of Blue ~ Navy, Peacock Blue, and Kingfisher.


I used the same "scribble" technique on the second snowflake.  TIP: if the color is darker than you want, just add more water and blot the wet ink with a paper towel.


Here are the snowflakes on the tags.


Happy Wrapping!