Today my post is all about GETTING IT DONE! As you know, I love scrapbooking! However, it can be time consuming & sometimes you just need to take some shortcuts.
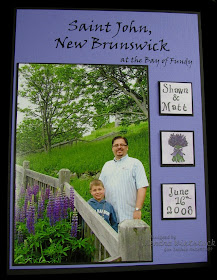
I'll get to some of those tips as my post goes on ~ but first, here is my fun little Inchie Arts page for today. This great picture is from our New England cruise last summer. I just love the vibrant purples and greens in this photo ~ not to mention my little guy (Matt) and my brother-in-law.
I'll get to some of those tips as my post goes on ~ but first, here is my fun little Inchie Arts page for today. This great picture is from our New England cruise last summer. I just love the vibrant purples and greens in this photo ~ not to mention my little guy (Matt) and my brother-in-law.

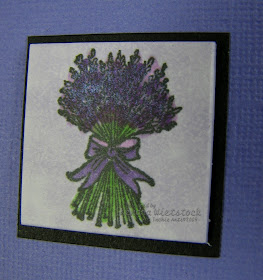
Here are the details: For the main flower image, I used the Itty Bitty Lavender image from Lockhart Stamp Company. I stamped it on the white Inchie square in black Palette ink. Then I used my Copic markers to color it & finally added just a touch of Pearl Ex pigment powder to make is shimmer. I used two additional Inchie squares to add the names of the people in the photo and the date it was taken. For the background, I colored each one the same using a lighter shade of purple so they would all tie in together. Then for the title, I simply fed my cardstock through my printer so I could play with the font and size. This was a simple and fast page.
Now the page size for this is actually 6" x 8 1/4" ~ odd sizing I know. But here is where the shortcut comes in...
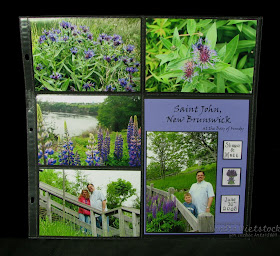
 This small scrapbook page is actually part of a larger page protector with photos you slide inside pockets. I know this is a pretty popular way to scrapbook these days, but I have to laugh and tell you that I've been scrapbooking this way for about 4 or 5 years now. Not all the time, but I tend to use this technique for theme albums (like trips) or when I'm so far behind that I feel like I'll never catch up.
 This small scrapbook page is actually part of a larger page protector with photos you slide inside pockets. I know this is a pretty popular way to scrapbook these days, but I have to laugh and tell you that I've been scrapbooking this way for about 4 or 5 years now. Not all the time, but I tend to use this technique for theme albums (like trips) or when I'm so far behind that I feel like I'll never catch up.
- Print & Sort - When I put together an album like this, first I print and sort my pictures. This album is for a trip & I want it scrapbooked chronologically. Therefore, I sort my pictures by day and events within that day.
- Page Protectors - Sometimes the biggest challenge is finding the right pictures (in the right orientation) for each pocket ~ so order a variety before you begin. Find the page protector that fit the photos you have for that day's events. Some photos may need to be trimmed to fit a different direction, reprinted, or left out if you don't have the right pocket for it. I usually find a way to make it work.
NOTE: These types of page protectors come with different sized pockets so you can add larger photos, documents, maps, etc. I bought the page protectors for this album a few years ago & they are from Scrapworks. Unfortunately, this company went out of business. However, there are some from Bazzill (Lickity Split) and We R Memory Keepers Photo Sleeves. I just ordered some of the We R Memory Keepers ones & they are due in May ~ I'll keep you posted if I like them.
- Full Layouts - I use in a 3-ring binder binder so I can add full 12x12 layouts to my album as well. This album is a Stampin' Up! Linen Album & the page protectors work beautifully inside. Generally, the holes for 3-ring binders are standard so you can mix and match protectors.

- Leave Blank Spots - But don't forget to leave some pockets open so you can add titles and journaling. That's where you can add all the fun little doo-dads from your scrapbook supplies. HOWEVER, don't make them too bulky!
In my trip albums, this is where I like to add information about what we did that day, titles of where we were (as I did here), or information about the port of call we visited. I do most of my journaling on the computer and then stamp backgrounds, use pattern paper or cardstock to add color. It's using your creativity in a smaller way, but including tons more photos in your book! - Another Benefit - When you get back from a trip, I like to look (and share) my photos right away. What's great about this album, is that you & your family can still enjoy your photos before they are 'scrapped' because they are all laid out and protected from nasty little fingerprints.
- You can do it! - Even if you don't scrapbook, you can do this! It's a fast, easy way to get those precious memories down on paper. Your photos are important ~ so document the details. You don't have to add all the pretty little doo-dads, but you really need to record the family history. Future generations will appreciate it!
NOW GO SCRAP SOMETHING!!!
Supplies Used: Inchie Squares ~ Inchie Arts; Cardstock ~ Stampin' Up!; Ink ~ Palette, Copics; Stamps ~ Lockhart Stamp Co, Hero Arts; Font ~ from Photoshop Elements.


Kendra, Good ideas on the scraping. :)
ReplyDeletelove this. great ideas!!!
ReplyDeleteKendra THANK YOU for sharing your GREAT advice!! Now I'm ready to really get going!!
ReplyDelete